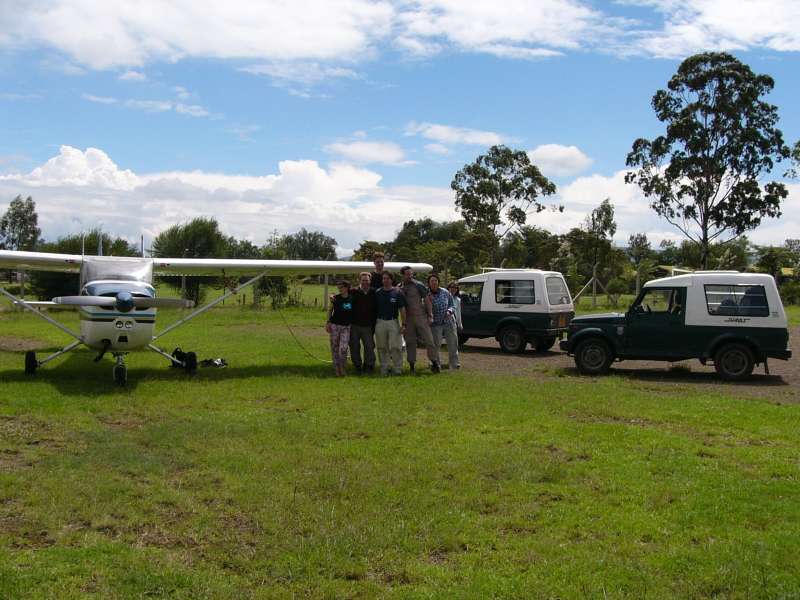
Crew and vehicles
Private homepage – Hans-Georg Michna
Back to the travel report Kenya 2010
Taking a Cessna 172 to high and hot airfields
Inspired by a May 2010 tour in Kenya
Last change: 2020-01-02 – Copyright © 2010-2023 Hans-Georg Michna
Click on the small pictures to see them enlarged, usually to 800 x 600 pixels.
Times are given in Kenyan time in 24 h format (without "am" or "pm"), i.e. 0:00 to 23:59 o'clock.
A few readers had the problem that after clicking on a picture, then going back to the main page, all thumbnail pictures were reloaded. This is typically caused by Internet Explorer cache corruption. It can often be repaired by going to the Internet options and deleting the temporary Internet files.
All photos are subject to copyright ©. If you want to reuse any photo, send me an email asking for permission, and I may send you the full-size photo, usually 1,600 x 1,200 pixels. Photos bear the copyright © 2010-2023 Hans-Georg Michna.
EXIF times in the pictures are UTC; add 3 hours to get Kenya time.
Table of contents
In May 2010 I organized a driving and flying safari with 8 people, two Suzuki Maruti Gypsy off-road vehicles and one Cessna 172, which I piloted myself.
Crew and vehicles
The route took us on a triangular journey from Nairobi Wilson up the Rift Valley to Baringo, then out to Samburu in the east, and back past Mt. Kenya via Mweiga to Nairobi Wilson. We refuelled twice at Nanyuki Civil.
![]()
|
All of the airfields are at least 3,000 ft above sea level and usually considerably hotter than the standard atmosphere would be at that altitude. Two of the airfields, Nanyuki Civil and Mweiga, are between 6,250 and 6,300 ft high and posed the biggest problems. Nanyuki lies next to Mt. Kenya on the western (usually lee) side. Mweiga is a sloped grass field where the prevailing wind blows down the slope, so usually one has to take off uphill. A Cessna 206 crashed there a few years ago during a downhill, probably tailwind, takeoff.
So does it take courage to go to these fields with a Cessna 172 that is considered underpowered by many pilots in Kenya? It sure does, but this does not mean taking an unacceptable risk, as I will try to explain. More than courage it takes knowledge, conscientiousness, and good preparation. Making a major mistake on these high and hot airfields can mean crashing the aeroplane and killing your passengers and yourself. I will go through the challenges and risks and analyze them one by one.
I will also mention some other procedures and specialties of these airfields and routes.
The Cessna 172 I used is an aeroplane with a four-cylinder, 160 hp engine and a fixed-pitch propeller. This is definitely not the preferred configuration for high and hot airfields. I would much rather use a Cessna 182 with a six-cylinder, 235 hp engine and a variable-pitch propeller, ideally with a turbocharger. But sometimes you have to take what you can get, and so the question arises whether the Cessna 172 can do it or not.
My answer is, yes, she can do it, with qualifications. Send an inexperienced pilot to a difficult high and hot airfield with a fully loaded Cessna 172, and you are seriously asking for trouble. It is all too easy to make a significant mistake, crash the plane, and kill everybody on board. The reason for this article is that I want to help pilots to understand the problems involved and to steer clear of the pitfalls.
The newer Cessna 172 S/SP has a four-cylinder engine with 180 hp. This makes it easier, and the manual states that the preferred takeoff configuration is 10° takeoff flaps. But it still says that takeoffs without flaps are an approved alternative. My take is that in these planes you should still not use takeoff flaps in a high, hot, and fully loaded situation, even with 20 hp extra power.
The first thing you should do when you go on such a trip is to read the aeroplane's manual very carefully. The manual was written by very knowledgeable people after very thorough testing of the aeroplane's design. You can safely assume that what the manual says is right and should be followed conscientiously.
However, the manual does not cover all combinations, does not always explain in detail why certain procedures are prescribed, and you don't want to experiment in marginal conditions with passengers out in the bush to find out. Therefore I will try to discuss some aspects in more detail and try to explain why exactly the manual says certain things and what would happen if you didn't follow the prescriptions.
You also have to be aware that a 6,300 ft high airfield in a hot climate takes the Cessna 172 close to its limits and that your margin of error is not very wide any more. This means that you may have to know and understand a little more than what the manual says. We will come to that soon.
So what does the manual say and what are the reasons behind the statements?
Standard takeoffs are done without flaps in all weaker single-engine Cessnas. Always check the manual. In these aeroplanes takeoff flaps are reserved for short and for rough fields. Moreover, the Cessna 172 manual says unequivocally that you should not use takeoff flaps on high airfields. To be absolutely clear, do not use takeoff flaps on high airfields even if they are short or rough. It also tells you the reason—at high altitudes or in hot weather or both the Cessna 172 may not climb well enough with flaps or may not even climb at all.
Keep the flaps retracted, and she will climb, even at 6,300 ft. My observation was that she usually climbed some 300 ft/min at 6,300 ft altitude, some 20°C above standard atmosphere temperature, at the airspeed recommended by the manual, and fully loaded. This is not much, but it is enough for a safe takeoff if all other conditions are suitable.
Since takeoff flaps of 10° can easily kill a 300 ft/min climb rate, the manual's recommendation makes eminent sense. You should use takeoff flaps only on short or rough fields and only at moderate altitudes, like 2,000 ft in cool air or near sea level in warm air. But even there you should never use more than 10° takeoff flap in a Cessna 172.
You could perhaps consider using less than 10° at somewhat higher altitudes, but the difference between, say, 5° of flaps and no flaps is too small to accept a reduced climb rate. You can achieve nearly the same effect by simply raising the nose a little higher (but read more about that later), so my recommendation is still to forgo takeoff flaps anywhere except on a short or rough field in dense air, i.e. near sea level in hot air or somewhat higher in cool air.
The manual contains tables that list the length of the ground roll and the additional distance required to clear a 50 ft high obstacle, depending on altitude and temperature.
The relevant figures for our most difficult airfields are the ones for 6,000 ft altitude and 20°C above standard atmosphere temperature. The ground roll under these conditions is 420 m. For grass runways the manual requires to add 15% to the ground roll, yielding 483 m, but have a good look also at whether the grass is mowed and dry. If not, you'd better add some more.
To climb over a 50 ft obstacle requires another 400 m. Obviously here the surface condition plays no role any more, as you have already lifted off.
The manual prescribes to climb out at 59 kt indicated airspeed.
In theory this figure should be slower than the best angle of climb speed, because at a lower speed the loss of climb angle is compensated by being able to begin to climb earlier. This means that 59 kt has to be taken as the absolute minimum, valid only for obstacles no taller than 50 ft. In theory the speed for higher obstacles should be slightly higher, and anyway a higher speed is safer as soon as you are sure to clear all obstacles. The best rate of climb speed is approximately 70 kt, the best angle of climb speed is approximately 60 kt.
In practice you have to consider that the aeroplane may not be in perfect shape. There may be little dents and dirt. Most importantly, the climb angle will be slightly less at higher-than-optimum speeds, but can be precipitously less at lower-than-optimum speeds. Somewhere around 50 kt indicated airspeed the plane will not climb at all at the high altitudes and hot temperatures we are worrying about.
The manual gives further detailed advice, so be sure to read and memorize all relevant information carefully. And read on for a more detailed discussion of the high-altitude takeoff.
The manual and the weight-and-balance information yielded the following weights for our purposes:
| Maximum takeoff weight: | 1043 kg |
| Payload with full tanks (151 l flyable fuel): | 262 kg |
Needless to say, you particularly do not want to test the takeoff performance on difficult airfields outside the prescribed envelope, so you should always make sure that you do not overload the plane, not even by a single kilogram. This means adding the weights of all persons on board, the weights of their clothes, and the weights of their luggage.
You will find that with full tanks you can usually not carry four adults. Even three require that they are not too heavy and that they bring along only minimal luggage. Things ease up as you burn off some fuel, but don't forget to calculate for full tanks when continuing after a refueling stop. With more payload you can fill the tanks only to the maximum takeoff weight limit.
Also make sure the center of gravity is within the prescribed range. Try to keep it well within the range by rearranging the loads favorably. With a typical three-person load (pilot plus two passengers, only one of them occupying the rear seats) it may be a good idea to stow some luggage far aft to avoid a center of gravity near the forward limit. That way the plane may be slightly easier to control. The nose-up/down attitude will be less stable, thus requiring lower control forces, but more attention by the pilot to keep the nose attitude and thus the angle of attack stable. The plane should also, in theory, climb slightly better because of a lower downward force created by the elevator.
So what does this mean for the takeoff, which is the most difficult phase for a Cessna 172 at high and hot airfields? How can you take off safely in these difficult conditions? What could go wrong?
In a stronger aeroplane, say, a Cessna 182, or in a Cessna 172 at sea level most pilots easily get away with the following procedure. Begin your takeoff roll. Apply full power. Wait until you are within the green range on the airspeed indicator. Raise the nose (rotate) and wait until the plane flies itself off the ground and begins to climb. Once the plane reaches its desired climb speed, usually around 70 kt, raise the nose a bit more to keep the best rate of climb.
On rough fields the procedure differs in that you raise the nose as early as possible, to take as much load as possible from the wheels to the wings already early in the takeoff roll. Again, wait until the plane flies itself off the ground and begins to climb.
Many pilots not conversant with bush flying at high altitudes in tropical temperatures are used to these simple procedures, and they usually work even there, provided the aeroplane is strong enough. In a Cessna 172, however, these procedures can kill you. Why is that so?
The underlying reason is that a Cessna 172 at 6,000 ft or above and in higher temperatures than that of the standard atmosphere no longer has the power of 160 hp. It may be closer to 100 hp, and that changes things quite a bit. In addition the wings require a higher true airspeed for the same carrying performance, which further extends the takeoff roll and obstacle clearing distances.
What's worse is that not only may the aeroplane not climb, it may also not accelerate when flying at 50 kt. The reason is that the wings produce too much drag at the high angle of attack needed to take off at this low speed.
The plane may take off in ground effect, but it will simply fly low above the ground, unable to climb and unable to accelerate. A stronger plane would also be unable to climb, but it would accelerate and soon reach a speed that enables it to climb. Not so a fully loaded Cessna 172 in a high and hot condition.
This is reminiscent of a series of tragic accidents in the first passenger jet plane, the de Havilland Comet B4, which were eventually traced to exactly this problem. Too early rotation brought this plane into the same condition, a lift-off in ground effect, but a subsequent inability to climb or accelerate. The unfortunate outcome was a number of cases of a deadly collision with the first obstacle after the end of the runway.
The solution for the Comet B4 was the introduction of the rotation speed concept, which was not known before this series of accidents. After understanding the problem, pilots were simply told to keep the nose down and the aeroplane rolling and accelerating until it reached a prescribed rotation speed. Only then was the pilot to raise the nose, lift off, and climb.
So what is the best rotation speed for the Cessna 172 on a high and hot airfield? In my experience, 50 kt is clearly too slow, as the plane may neither climb nor accelerate at that speed. She would probably climb in fairly dense air, i.e. at low altitudes, where you have more of the full 160 hp of the engine. But high and hot at 50 kt she may only fly in ground effect.
A simple rule of thumb is: Begin to raise the nose slowly at 55 kt and do not try to climb before reaching the prescribed 59 kt. It may be safer to remember and concentrate on the figure of 60 kt to avoid any risk of mistaking 59 for 50. If you have an obstacle to clear and your speed rises above 60 kt, gently raise the nose further to keep your speed down to 59 or 60 kt, but do not allow the speed to sink below 59 kt.
Things can be even more difficult when taking off uphill, particularly on a rough field, like a grass strip. In such conditions even at 55 kt the plane's ability to climb and accelerate may be eaten up by the additional demand of the slope and perhaps the grass, and she may again not lift off or not climb and not accelerate.
Add to this the fact that any oncoming wind, which is usually advantageous and desired, would be blowing downhill and therefore have a downdraft component, and you can already be in trouble at 55 kt on an uphill takeoff. Fortunately, runways rarely slope up really steeply, so the downdraft component is small and does not reach anwhere near the 300 ft/min climb performance of the plane, but it is still a factor.
This is exactly the situation at Mweiga airfield with the usual southeasterly winds. Note also that taking off downwind, even if it were an option, would not solve the downdraft component problem. Downdraft is downdraft, no matter which direction you fly.
The solution to the uphill problem is to accelerate while rolling without raising the nose (and with it the drag), until you reach or very nearly reach the best climb speed of 59 kt. Only then raise the nose, lift off, and climb.
If your runway is rough, but has plenty of length, like Mweiga, what you can do to relieve your gear of as much load as possible, is a careful compromise. Raise the nose, but raise it only slightly to avoid creating too much drag, but do not yet try to lift off. Thus you will take some, but not all load off the wheels without actually taking off at a too low speed and thereby creating a deadly amount of drag. With this procedure also lift off only when reaching 59 kt.
During the takeoff roll, compare your speed to the remaining runway. You should be at 59 kt and thus get airborne after no more than 600 m of runway. Since Mweiga is a kilometer long, You can still abandon the takeoff and bring the plane to a stop before the end of the runway, if you notice that you are not reaching 59 kt when you have only another 400 m to go. This is actually a simple version of the balanced field length concept used for bigger aeroplanes.
On some runways, where you cannot see the entire runway due to a curved slope, and Mweiga is again an example, it can be helpful to remember a marker along the runway that indicates 600 m of your takeoff roll. Then, during the actual takeoff roll, you can check whether you have reached your takeoff speed when you pass that marker. If not, you know that you can still safely abandon the takeoff at that point.
There are several other ways to shorten your takeoff roll that have nothing to do with rotation or climb speeds. Instead some of them have to do with engine performance, and they are all crucial with respect to a successful takeoff in high and hot conditions. Here you always want to play all your cards at once.
The first one is the takeoff direction. On an airfield with one runway you have only two choices. If you have some wind blowing along the runway, you have to take off against the wind.
If the runway has a slope, you want to take off downhill, but any considerable wind usually has a bigger effect than the slope, so the wind almost always has the higher priority. Consequently you usually have to take off uphill into the wind to avoid taking off with a tailwind, even if that would be downhill.
Do not succumb to temptations like avoiding to taxi all the way down a long and rough runway. Again, Mweiga is an example. The shortcut to take off directly from the parking with a tailwind, even if it is downhill, can kill, as a crash of a Cessna 206 at Mweiga illustrated (assuming that that was indeed a tailwind takeoff).
Yet another consideration is an obstacle near the end of the runway. A high obstacle, such as the hills at the end of the Samburu Oryx or Sasaab airfields, may force you to take off away from the obstacle.
Actually in both of these cases you may be able to fly a curved departure before the obstacle, so these are not the most critical examples. You have to take into consideration though that any steeper turn reduces or cancels your climb rate. Read more about this situation in the next sub-chapter.
In any case an obstacle in the departure path is no excuse for trying an impossible takeoff in the other direction. A sufficiently unfavorable combination of wind and obstacle should prevent you from taking off altogether. In such a situation you have to use the aeroplane's manual to determine the required takeoff roll and possibly the distance to climb over an obstacle, taking into accound any tailwind and slope. If the figures say that a takeoff is impossible, you know what to do. There are situations in which staying on the ground is the only way to stay alive.
If there is an obstacle that is farther away from the end of the runway, you should also plan a good departure route before you climb into the plane. You should firmly memorize which way to turn and when. An example is the long runway at Nakuru Lanet, which has the Menengai Crater wall in the north. With a northerly wind the takeoff is uphill, the ground is rising, and it begins to rise even more steeply already some distance before the crater wall.
So if the wind clearly dictates to take off towards the north, establish a good climb rate, then do not hesitate to turn. Because of prohibited areas around Nakuru town you will probably turn to the right and soon face the Aberdare mountain range, so be quick to turn right again if you cannot clear the high ridges quickly and easily. If you actually want to fly north across Menengai Crater and are not clearly climbing fast enough, first stay away from the crater and climb high enough before turning north and overflying the crater at a safe altitude.
Never try to clear the crater edge or any mountain range at a right angle, particularly not straight into the wind, because of expected downdrafts caused by the wind blowing over the edge. At Nakuru Lanet airfield you should be quite a bit higher than the crater edge before flying over it, and a safe method is to do that while flying nearly parallel to the edge, so you can easily turn away when catching an unexpected downdraft. Even after crossing the edge, it may be a good idea to keep flying parallel along the edge on the luv side for a bit longer to use the updraft on the other side to climb more rapidly.
Before a difficult takeoff it is doubly important to do a thorough engine check. Be sure to drain the fuel sumps properly and check the engine particularly carefully.
On a paved apron and on a grass field you can do a normal engine runup to the rpm figure prescribed by the manual. Only on stony fields you may have to use a lower rpm figure to avoid damage to the propeller from stones, but fortunately the high-altitude fields in Kenya are usually grass fields or, in the case of Nanyuki Civil, paved. On paved fields in Kenya be sure to avoid stony places or potholes near the propeller. Taxi to a well-paved area, if necessary, before doing the engine runup.
Never forget to lean the engine before taking off from a high-altitude field, because in the thin air you would otherwise drench the engine in an over-rich mixture and not get full power.
There are two leaning procedures. One is the procedure prescribed by the manual, i.e. leaning during the engine check runup at the prescribed rpm.
The other is a tad better and can be used on critical, very-high altitude airfields, such as Mweiga or Nanyuki Civil, that do not have stones or sand. Here you can lean to the actual maximal rpm at full power. If there is no other traffic and you have an extra minute of time, put the aeroplane into the start position on the runway, step firmly on the brakes, then apply full power. Now lean slowly until you see a rise in rpm. If you lean too far, rpm will drop. In that case push the mixture some way back to rich, then try again to lean until you see the rpm rise.
Make sure you do not lean too far. That is much more dangerous than not leaning enough, so try to stay on the rich side while trying to maximize the rpm. The simplest way to do it is to lean slowly until you see a rise in rpm, then immediately stop leaning, check that the rpm does not come down again, and leave the mixture in that position. If in doubt, make sure you are always a little bit on the rich side and never on the lean side of the maximum rpm setting.
If you are already in the takeoff position on the runway and if you are certain to have found the best leaning point, glance over the engine instruments again, and if all of them show good and stable values, release the brakes and start your takeoff roll already with maximum power.
On a busier airfield you can still do this full-power leaning procedure on the apron, but do not blow the full takeoff-power blast towards other aeroplanes or people.
Never lean during the actual takeoff roll because of the risk of leaning too far and losing power. Even if you quickly pushed the mixture back to rich, you would already have given away some acceleration and hence would need more runway to take off, not to mention the distraction you do not want to have during this critical phase.
Check the engine instruments once more during the takeoff roll. If you have the slightest doubt about getting full power, abort your takeoff roll, brake sharply to get the plane to stop before the end of the runway, and investigate. During a difficult takeoff your life and that of your passengers depends crucially on the perfect performance of your engine.
If you have leaned at full power and taken off successfully, you can keep climbing at full power, because at a high altitude your engine is not actually running at full power and also the air is getting cooler as you climb. There is no need to readjust the mixture at the full power setting, as the thinner air will anyway make the mixture relatively richer. After reaching your cruise altitude or at least a very safe height, reduce power gently, then immediately readjust the mixture, because it could be too lean at reduced power. Some aeroplane power controls enrich the mixture slightly at the max power setting, meaning that it becomes too lean when you reduce power.
If you ever have a similar situation in a different aeroplane with a constant-speed propeller, the leaning procedure is similar, but since there is no rpm change, you need an exhaust gas thermometer (EGT) for precise leaning. Instead of a peak in rpm you see a peak in the exhaust gas temperature instead, otherwise the procedure is the same.
If you have a constant speed propeller, but no EGT, you are out of luck. In this case you cannot lean precisely at full power. You have to lean with the propeller pitch fully fine (max. rpm), but at a power setting that does not reach the maximal rpm. You have to stay on the rich side, because of the likely inaccuracy between different power settings. If possible, have an EGT installed.
You should always want to use all the runway you can get, but you want that particularly on a high and hot runway. Therefore taxi as far back on the runway as possible. On some fields you can even taxi off the runway to get a few extra meters, provided that the ground is good enough for the early takeoff roll. Every extra meter helps.
Another way to lose effective runway length is to begin your takeoff roll before you have applied full power. You may have to do that on stony gravel runways like Baringo to protect the propeller, but if you have a grass or paved runway, don't do it. Instead step on the brakes, apply full power, lean to max rpm as described above, and check the engine instruments. Only then release the brakes and begin your takeoff roll with the full acceleration provided by your engine, which is now already running at its highest possible rpm and power. This also gives you some added security of stable fuel flow, because you may notice any anomaly earlier.
Apply everything you have learned and avoid all possible mistakes you can think of. For example:
Landing an aeroplane on a high and hot airfield is much easier than taking off from one, but it still poses some problems and risks that you should be aware of.
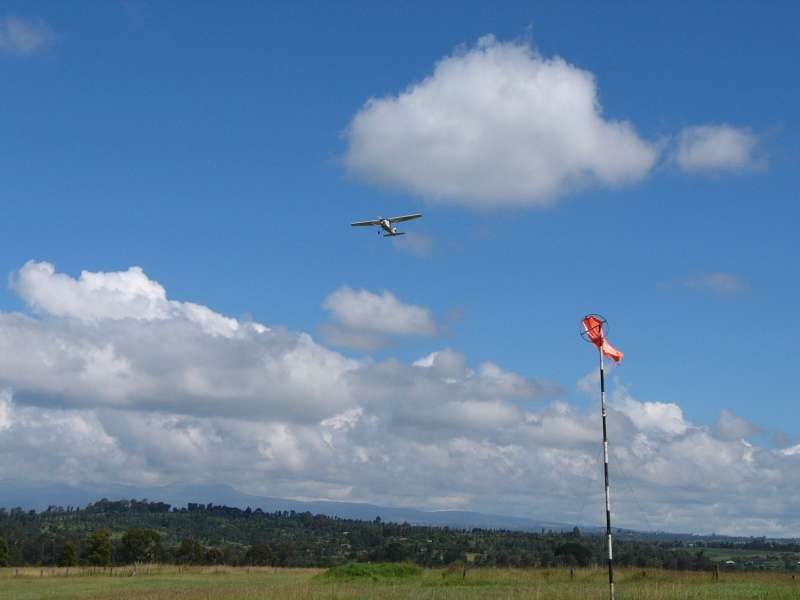
As usual, you want to land into the wind, rather than with a tailwind, unless other factors like high obstacles dictate otherwise. Determine the wind before you arrive by looking at the windsock. If there is no serviceable windsock, look at smoke or cloud shadows, but the latter can be misleading. Another procedure is to fly across the airfield at a right angle and observe your sideways drift.
If you cannot determine the wind direction and therefore have a risk of some slight tailwind, use full flaps, approach short, and keep your approach speed a little lower than usual, like 65 kt instead of 70. Treat the approach like a short-field approach, in which you want to land near the threshold. If there turns out to be some tailwind, you may not actually be able to touch down near the threshold, but at least you will not use up too much of the runway before touching down and will still have enough room for braking and stopping. If you feel that you may have a tailwind and find yourself too fast to touch down short, consider abandoning the landing and going round again.
Be prepared to brake strongly soon after touchdown, because you don't want to roll for long at the higher speed to avoid undue wear on the gear and because you may not have as much runway left in front of you as in a normal landing.
To be able to brake hard you first have to reduce wing lift. Immediately lift the landing flaps after touchdown and gently push down the nose while at the same time increasing the brake force.
Pushing the nose down unfortunately creates two new risks—that of damaging the nosewheel when there are holes or ditches on the runway and that of wheelbarrowing, i.e. putting too much load on the nosewheel, so the main wheels lose firm contact with the ground.
So do things gently. Do not step on the brakes too hard while you still have no weight on them. If you notice that your main wheels begin to block, release pressure on the brakes. You do not want to lose your steering ability by swerving. A good compromise should enable you to stop a Cessna 172 in 150 m on a paved runway and not too much more on a grass or gravel runway.
Landing downhill poses the problem that you may land longer, i.e. further down the runway, than desired. Again use full flaps, approach with a somewhat lower speed, and keep a higher sink rate to make sure you can put the aeroplane down early.
Landing uphill is much easier, but it makes a go-around more difficult, as you have to climb away from rising ground. See below for go-around procedures.
Make a decision whether you can land over the top, using a steep glideslope, whether you prefer a curved approach past the side of the obstacle, or whether you cannot land from that side at all.
An example is Samburu Oryx airfield, which has a hill near its northern end. My preferred procedure is to land with a steep glideslope over the top of the hill, but I have to fly a careful compromise between an overly steep approach and getting uncomfortably close to the trees on the hilltop. But with a single-engine Cessna and full landing flaps it is possible to fly a steep enough approach there. But if you are comfortable with a curved approach past the side of the hill, akin to flying a very tight circuit with a very short final, that is also a good choice, if you can control your more or less curved descent properly and arrive on the airfield at the right speed and angle.
Another example is Sasaab airfield with a hill near its eastern end. I have never landed there, but from the ground the hill looks threatening and may be negotiable only with a curved approach or takeoff.
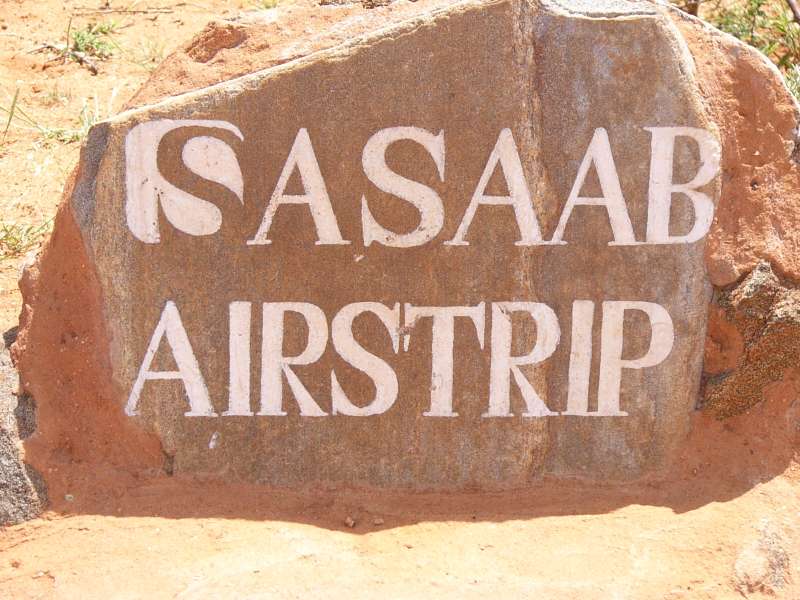

Sasaab airstrip
Such obstacles pose no problem when you actually land, but they do become a problem when you have to go around (and later when you take off again in the same direction). Your only recourse, short of not using that direction in the first place, is to turn as early as possible after making the go-around decision.
You should also try to make a go-around less likely by checking the airfield more thoroughly from the air before landing, by flying a particularly precise approach, and by aborting any imperfect approach early and going around before the obstacle becomes a threat.
A high and hot go-around in a Cessna 172 is also difficult and has less margin for error than in denser air. Make sure you are well prepared for a go-around and know exactly what to do, because it is all too easy to make a deadly mistake. The major risk factors are the lack of any climb performance with flaps and the large trim changes when retracting the flaps.
There is no simple rule of thumb, but in the most difficult situation, short final in an approach to a hot and high airfield with full flaps, you have to apply full power, then retract the flaps as quickly as possible, but only if you have sufficient speed. Remember, stalling speed is higher with less flaps. So be sure to have and keep sufficient speed before you begin to retract the flaps and do it while increasing or keeping up your speed. Also be careful not to lose too much height because of the required large trim changes. But you may have to lower the nose and lose some height to gain the required speed.
This is not easy. All I can say is that you have to check the airspeed indicator every few seconds, and I mean every really few seconds, to keep the speed between 60 and 70 kt with the higher speed preferred, while at the same time retracting the flaps and retrimming the elevator as quickly as you can without losing control of speed or height.
Retracting the flaps all in one go is dangerous, so do not try that unless you have very successfully trained it before in the same type of aircraft. It is dangerous and not considered a proper procedure.
So first make sure your airspeed is well above stalling speed, i.e. 60 kt at the very least. Quickly retract the flaps to 20° and retrim, check your speed, retract them to 10°, retrim, check your speed, then retract them completely, retrim, check your speed, while also watching your height, your surroundings, and your flight path. Did I write, "check your speed" often enough? Check your speed! Be fully aware that the Cessna 172 may not climb in a high and hot situation until you have the flaps fully retracted, so you do not want to delay the flap retraction unnecessarily.
To cap it up, the main go-around accident risks are:
There is not much to say here. Wilson is high, at 5,535 ft, but its runways are paved and long, so you should not have any problems if you don't rotate too early. Biggest mistakes would be to use takeoff flaps and to overload the plane.
This airfield is private and requires prior approval by telephone. The AirSpray company no longer exists, but the airfield is still usable and your best choice in Naivasha. The public airfield, Naivasha South, is unsafe.
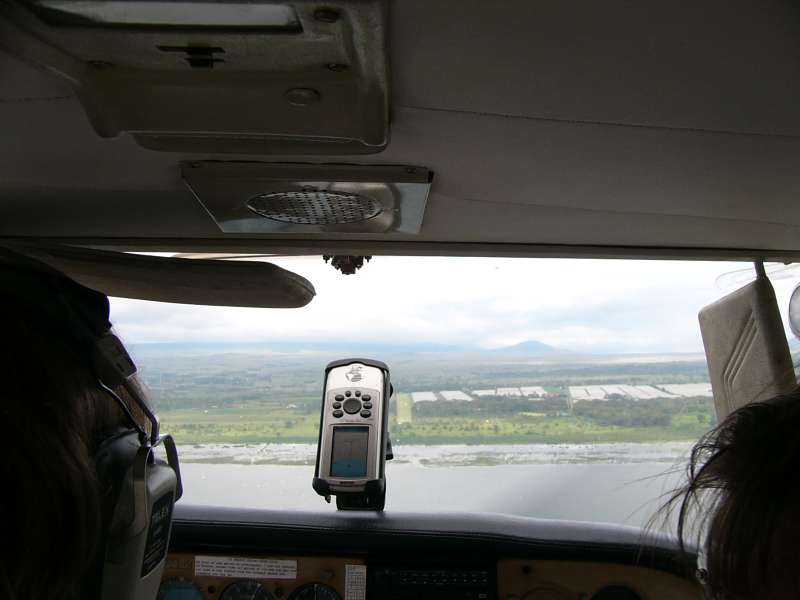
Final approach over the lake to Naivasha AirSpray
The AirSpray airfield has a kilometer-long grass surface and slightly slopes down towards the lake. On the access and parking end away from the lake there are high trees in the flight path, so it is usually preferable to take off towards the lake. The wind usually also supports that takeoff direction.
Be wary of shearwinds. Approach and climb with higher speeds than usual, if possible.
Despite lying inside the Rift Valley, this airfield is still higher than Nairobi at 6,300 ft. This, along with the often warm air, makes it non-trivial. Use your high-altitude procedures here, and you will take off safely.
Along the runway there are high trees directly to the left and right of the airfield. You may not be able to climb above them, so you have to watch out and fly precisely between them to avoid any deadly wingtip contact.
This is a large gravel and grass airfield with two crossed runways. The longer one is 1.7 km long, runs roughly north-south, and slopes up towards the north.

Final approach view to Nakuru Lanet airfield from the south with Menengai Crater
on the horizon
After taking off towards the north, you have rising ground, then faster rising ground, then the edge of Menengai Crater in front of you. If your plane does not climb satisfactorily, you have to turn away from high ground. Consider taking off in the other direction even with a slight tailwind, because the runway is very long.
There are restricted or prohibited areas towards the northwest, i.e. towards Nakuru town, so look them up on your map and don't go there.
Baringo, at some 3,300 ft altitude, is not critically high, but it is very hot, so you have to apply high and hot procedures here too.
The airfield is always full of sheep and goats. Every time I approached it, I had to fly a low pass to alert the shepherd, who then drives them off the runway. Be still wary on your second approach and go around again if there is any threat of a sheep or goat moving onto the runway.
After touchdown brake decidedly to reduce your speed and with it the likelihood of damage by stones being thrown up by your wheels and hitting your elevator or wings, not to mention goats suddenly crossing the runway.
The hangars or roofs are private. You cannot use them. Park on the western side of the runway near the entrance and be sure to park your plane sufficiently out of the way, so you do not obstruct the runway.
The gravel airfield runs in a north-southerly direction. Beyond the southern end there are some ridges to clear, so be prepared to turn left towards the lake in time if you are not sure you can climb above them.
The stony ground demands that you exercise caution when testing the engine. Try to find a clear place without stones or reduce the engine check to some 1,500 rpm. Begin your takeoff roll with less than full power and gradually increase power over the first 50 m, as your speed increases.
At 6,250 ft altitude this is a very high place, demanding good high-and-hot procedures. The north-south runway is paved and 1.2 km long. The wind can be tricky next to the mountain, so be ready to turn away from high ground if you experience downdrafts or shearwinds.

Final approach to Nanyuki Civil airfield. Photo: Silvia Ackermann
A private company on Nanyuki Civil had Avgas 100 LL in 2010. There seems to be a stable supply, but it cannot hurt to call them when planning your refueling stops.
Nanyuki Civil lies inside the Laikipia Air Base control zone (Nanyuki Tower, 124.3 MHz as of 2010) and has only two permitted access lanes. The southern one goes via Naro Moru along the road. The northeastern one goes via Timau and requires an additional call to Nanyuki Tower when overhead or abeam the Mt. Kenya Safari Club (which has a grass airfield or two).
Nanyuki Tower is sometimes unmanned and does not answer. In that case transmit blind and follow the same procedures.
I could not find out whether the required calls are only at the Mt. Kenya Safari Club and the control zone boundary south of Naro Moru and east of Timau or whether you are also expected to call overhead Naro Moru and Timau. I have also been told that the restrictions are often relaxed and allow straight routing towards Nanyuki Civil from any direction, as long as one keeps a distance of 5 nm from Laikipia Air Base (which is not always quite possible near Nanyuki Civil).
This is a long and wide gravel airfield inside the Samburu Game Reserve (satellite photo). Samburu Sopa Lodge is in walking distance, some 500 m from the airfield (although I personally prefer to stay at Samburu Game Lodge down at the river).
Airfields, lodges, waypoints in Samburu and Buffalo Springs.
(Rivers and roads are somewhat inaccurate on this map.)
There is a hill near the northern end of the runway. I have never had to take off towards it. I usually land from the north though, approaching steeply and directly over the top of that hill. An oblique or curved approach or a very tight circuit with a very short final is probably also a good choice.
The runway has a hump a bit south of the middle and appears to slope down on either side.
There is a little house on the northeastern edge of the runway with a small concrete water crossing to make it easier to taxi off the runway towards the house in the rainy season. I have always used that to taxi off the runway and park the aeroplane near the house, which is used by rangers, who also let you pay the entrance fee for the nature reserve.
On the other, south side of the river in Buffalo Springs Game Reserve there is the partially paved airfield Samburu South (HKSB), but since the bridge was destroyed in 2010, until it is rebuilt this is not a choice when trying to access the other, northern side.
Samburu South airfield
Another airfield, Koitogo, which is nearer to the river and on the northern side, inside Samburu Game Reserve, is apparently disused, but technically usable for aeroplanes like the Cessna 172.
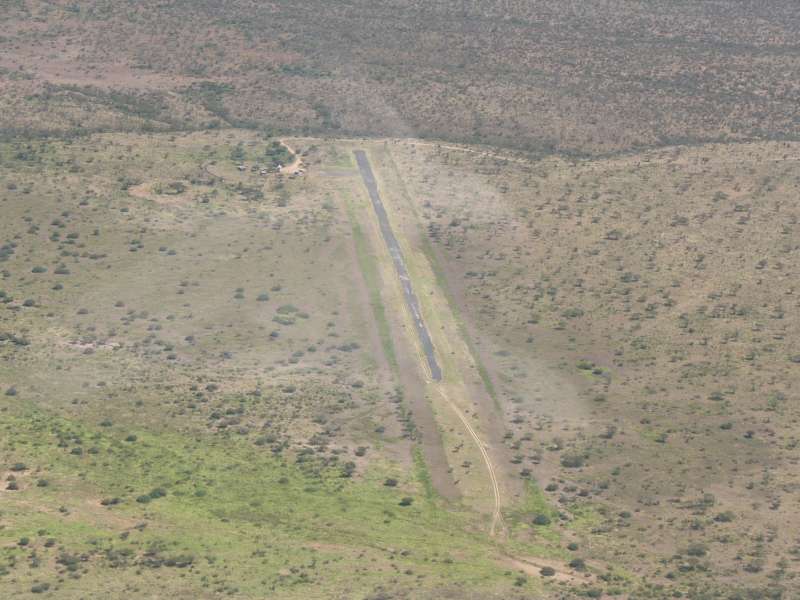
At nearly 6,300 ft above sea level this is one of the highest popular airfields in Kenya. Its proximity to the Aberdare Country Club (a few kilometers, still in walking distance), which is the base station for the famous forest night lodge The Ark, makes it attractive.
The grass runway is one kilometer long and 25 meters wide, but the grass is not always cut across its full width, so stay near the middle. It slopes down towards the north, but the wind usually favors an uphill takeoff towards the south.
The runway can be unusable for takeoffs when it is wet.
A successful takeoff on Mweiga airfield
Please click on the email symbol below and send me an email if you have any comments on this article.
Copyright © 2010-2023 Hans-Georg Michna.
Private homepage – Hans-Georg Michna
Back to the travel report Kenya 2010

hits since 2010-06-14
Free PHP scripts by PHPJunkYard.com